

Of all the features in macOS, the Finder will feel like one of the most familiar if you’ve recently made the switch from Windows. It’s Apple’s equivalent of Microsoft’s File Explorer, so finding your way around should feel simple and familiar.
Beyond being a basic file organizer, though, the macOS Finder is a surprisingly deep tool, and it can put a lot of power in your hands if you know how to use it. To help with that, we’ve put together this beginner’s guide to give you everything you need to quickly master the Finder on your brand-new Mac.
What is the Finder?
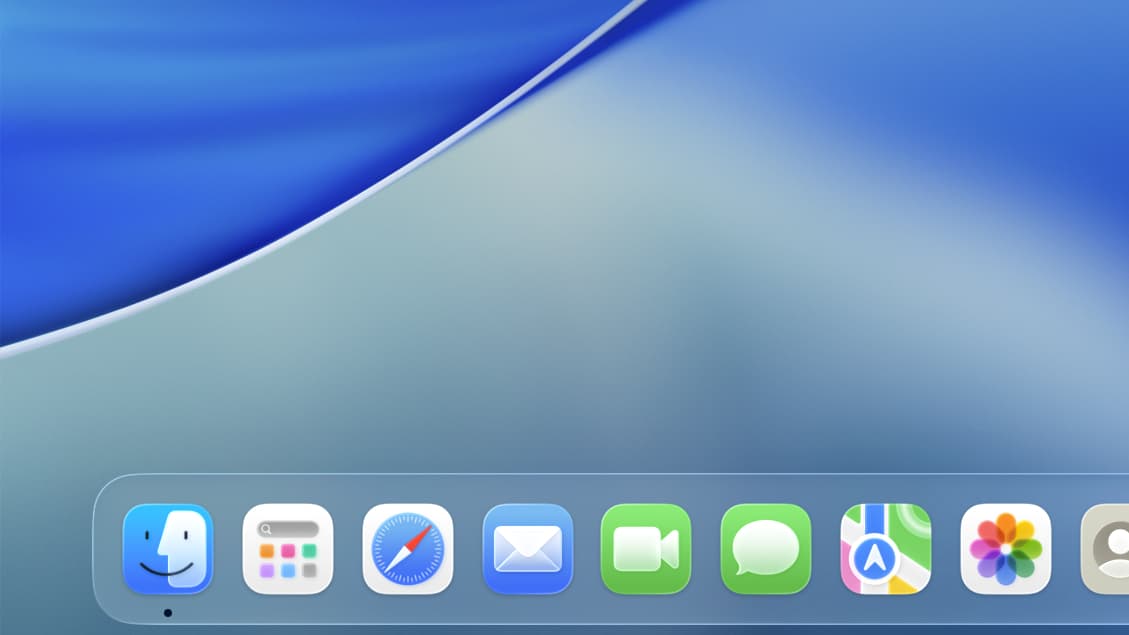
The Finder’s icon – a blue and white smiley face – is one of the most recognizable symbols of macOS. The app is permanently housed in your Dock (the bar of icons that runs along the bottom of your Mac’s screen). To open the Finder, click its icon in the Dock.
Article continues below
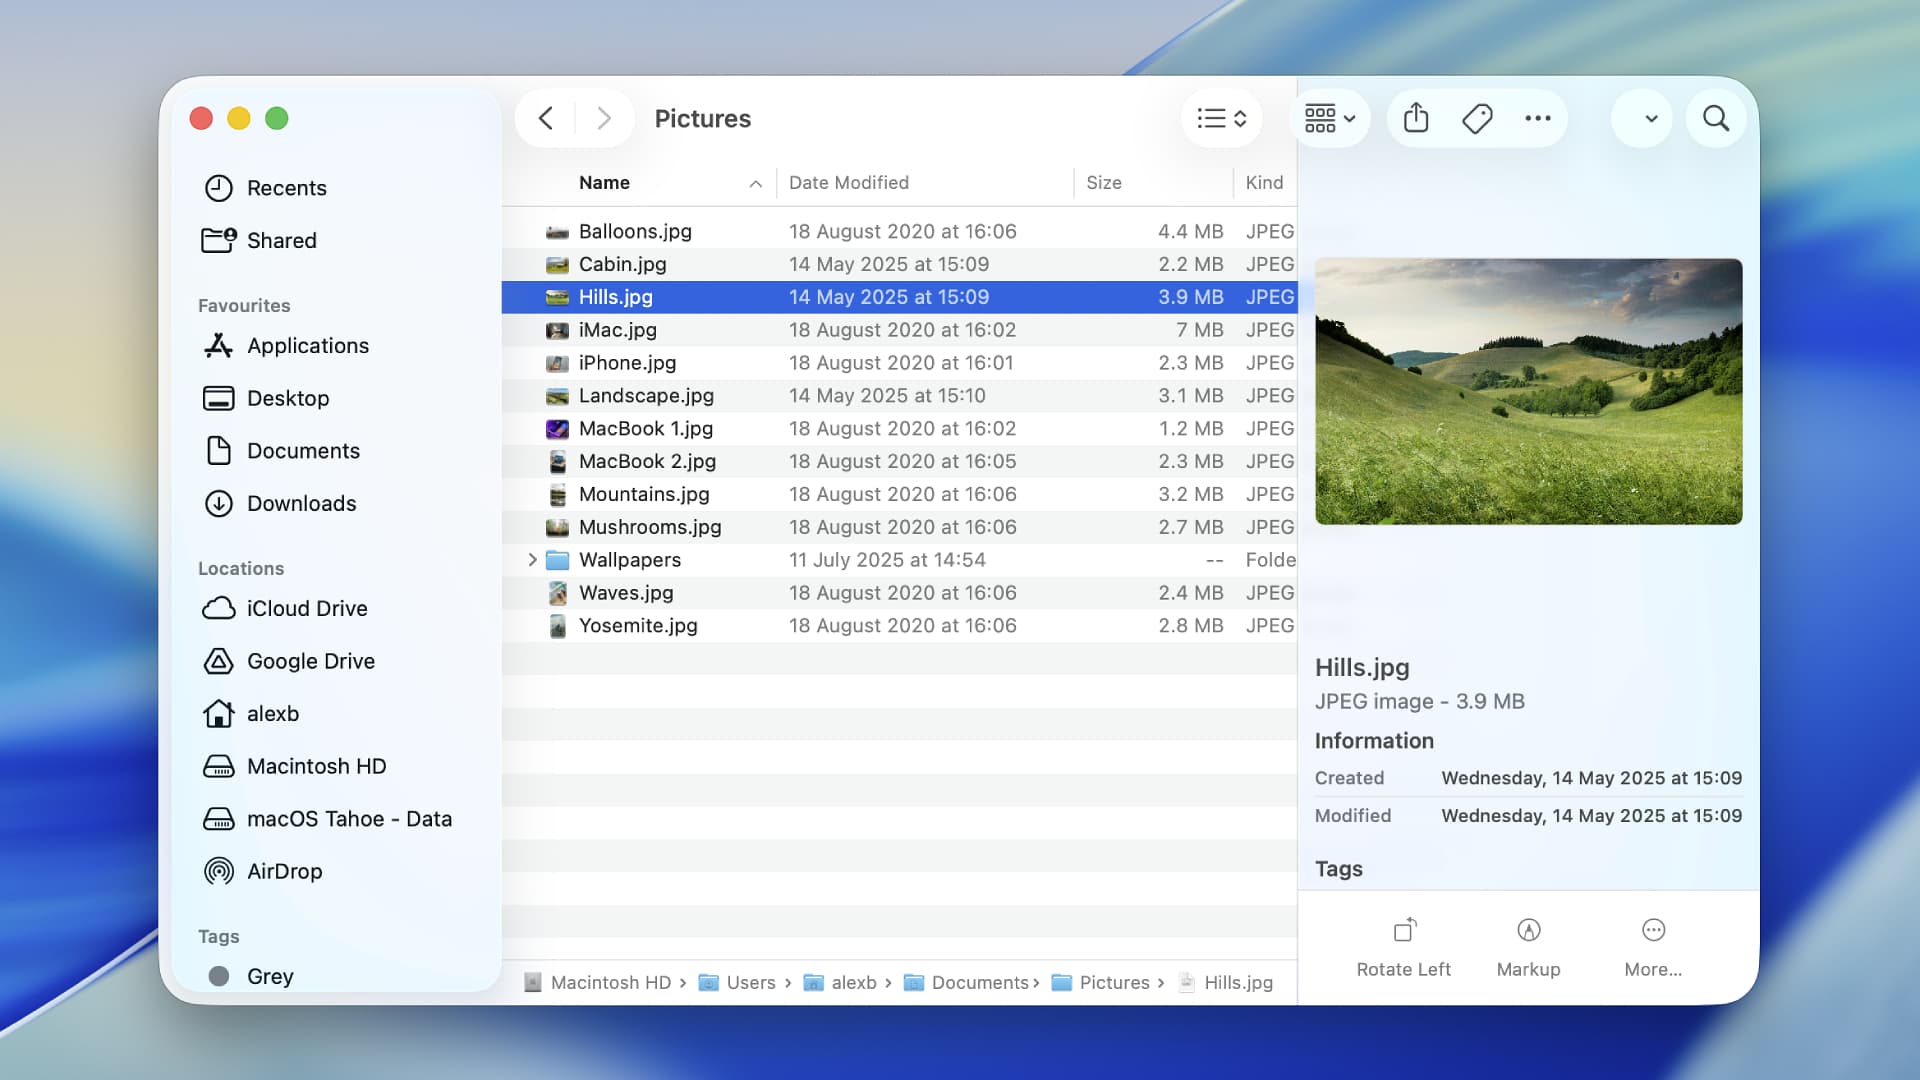
When the Finder launches, you’ll see a left-hand sidebar listing common locations (such as your Applications folder, your desktop and your downloads). There’s a toolbar along the top, while the main body of the Finder window displays your files and folders.
The Finder can show items in various different ways. On the right-hand side of the app’s top toolbar is an icon depicting four boxes in a square shape. Click it, then pick either “as Icons,” “as List,” “as Columns” or “as Gallery” to change how files are displayed. When you’re using the List view, you can also sort files by clicking the column headers at the top of the Finder window.
To the right of this square button is an icon for grouping your files (it looks like six squares arranged in two rows). Click this to group items by name, kind, date modified, and more. And if you want files to adhere to a grid in the Icons view, right-click an empty space and select Sort By > Snap to Grid, then right-click again and pick the Clean Up option.
What if you want to sort your files into folders? That’s easy enough. Just right-click an empty area of the Finder window and select New Folder. You can also press the … button in the top toolbar followed by New Folder; click File > New Folder in the Finder menu bar; or press Shift + Command + N on your keyboard. Give the folder a name, then press Return. Rename a folder by clicking it, pressing Return, then entering a new name.
Moving files is as simple as dragging and dropping them into folders. By default, files will be moved, not copied. To copy a file into a folder, click it, press Command + C on your keyboard, then double-click the destination folder and press Command + V.
To move several files at once, drag your mouse pointer over the files or hold Command and click them individually, then either move or copy them in place. If the files are next to each other, you can click the first one, hold Shift, then click the last one to quickly highlight them all.
Items can be viewed and edited in the Finder without opening them – just click the file and a preview pane should open on the right showing the item’s details, including a larger view if it’s an image. If you don’t see the preview pane, click View > Show Preview in the Finder’s menu bar (that’s the bar of control menus that runs along the top of your Mac’s screen).
Alternatively, click the file in the Finder and press the Space bar to open a preview (this feature is called Quick Look). When the preview pane is enabled, click View > Show Preview Options to customize what information is displayed in the preview window.
Dive deeper
Finder has many advanced controls that can speed up your work, of which Smart Folders are particularly handy. Smart Folders automatically add files that meet your set criteria. To create one, click File > New Smart Folder in the Finder menu bar. In the search bar, type a criterion (for example, type “recipe,” then click “Contains ‘recipe’” under the Content header. This will find any files whose contents contain the word “cake”), then click the + button to add further refinements (like the type of file you want to include). When you’re done, click Save.
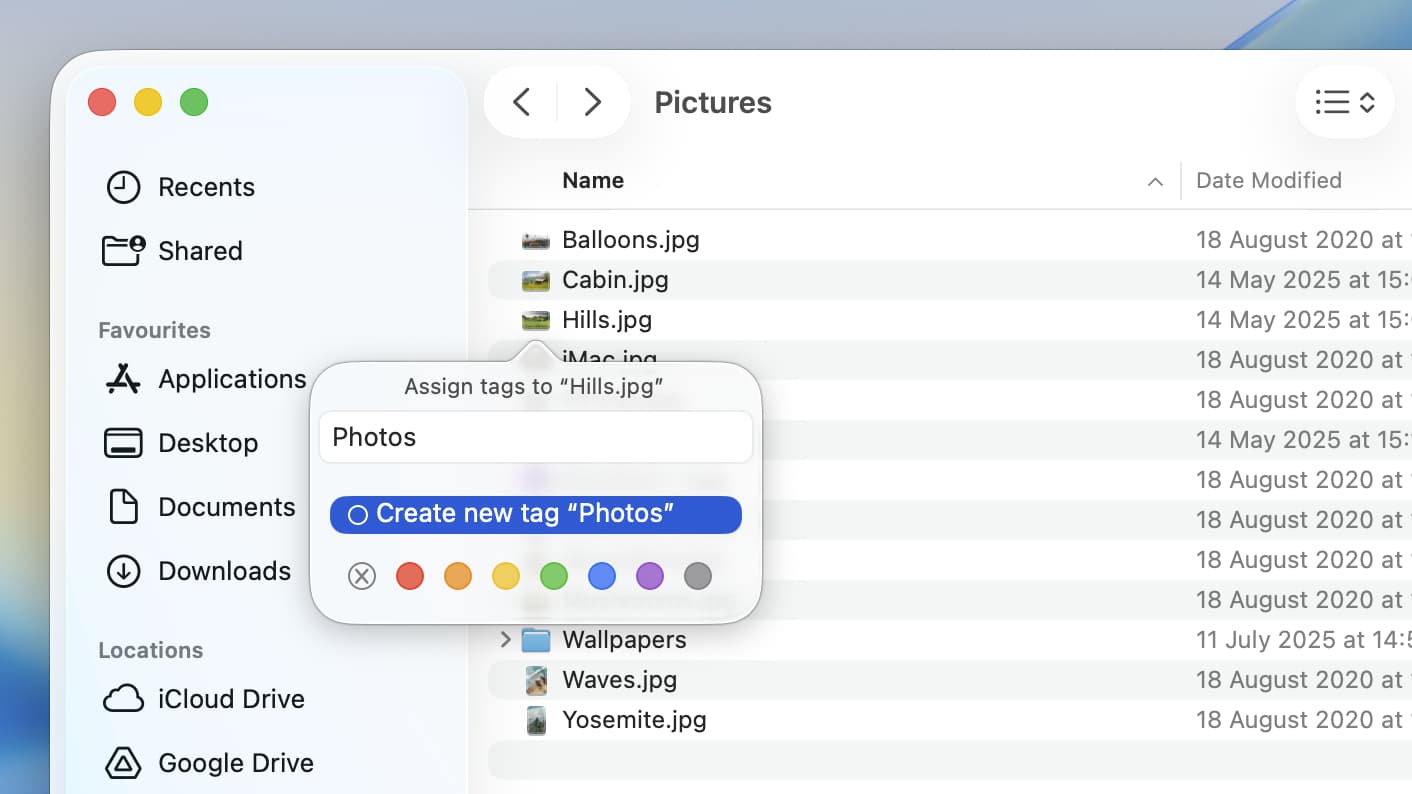
Tags are a similarly useful way to organize your files in the Finder. Right-click the file you want to tag, then pick one of the colored dots, or click Tags to add your own (for the latter, enter a name and click a color to create the new tag). You can find tagged items by searching for the tag name in the Finder’s search box (in the top-right corner), clicking the tag name in the left-hand sidebar, or by clicking the grouping button in the top toolbar and picking Tags.
Not to be confused with tags, tabs are another helpful Finder feature. They let you keep two separate Finder instances within one window, aiding organization. Just press Command + T or click File > New Tab to add one.
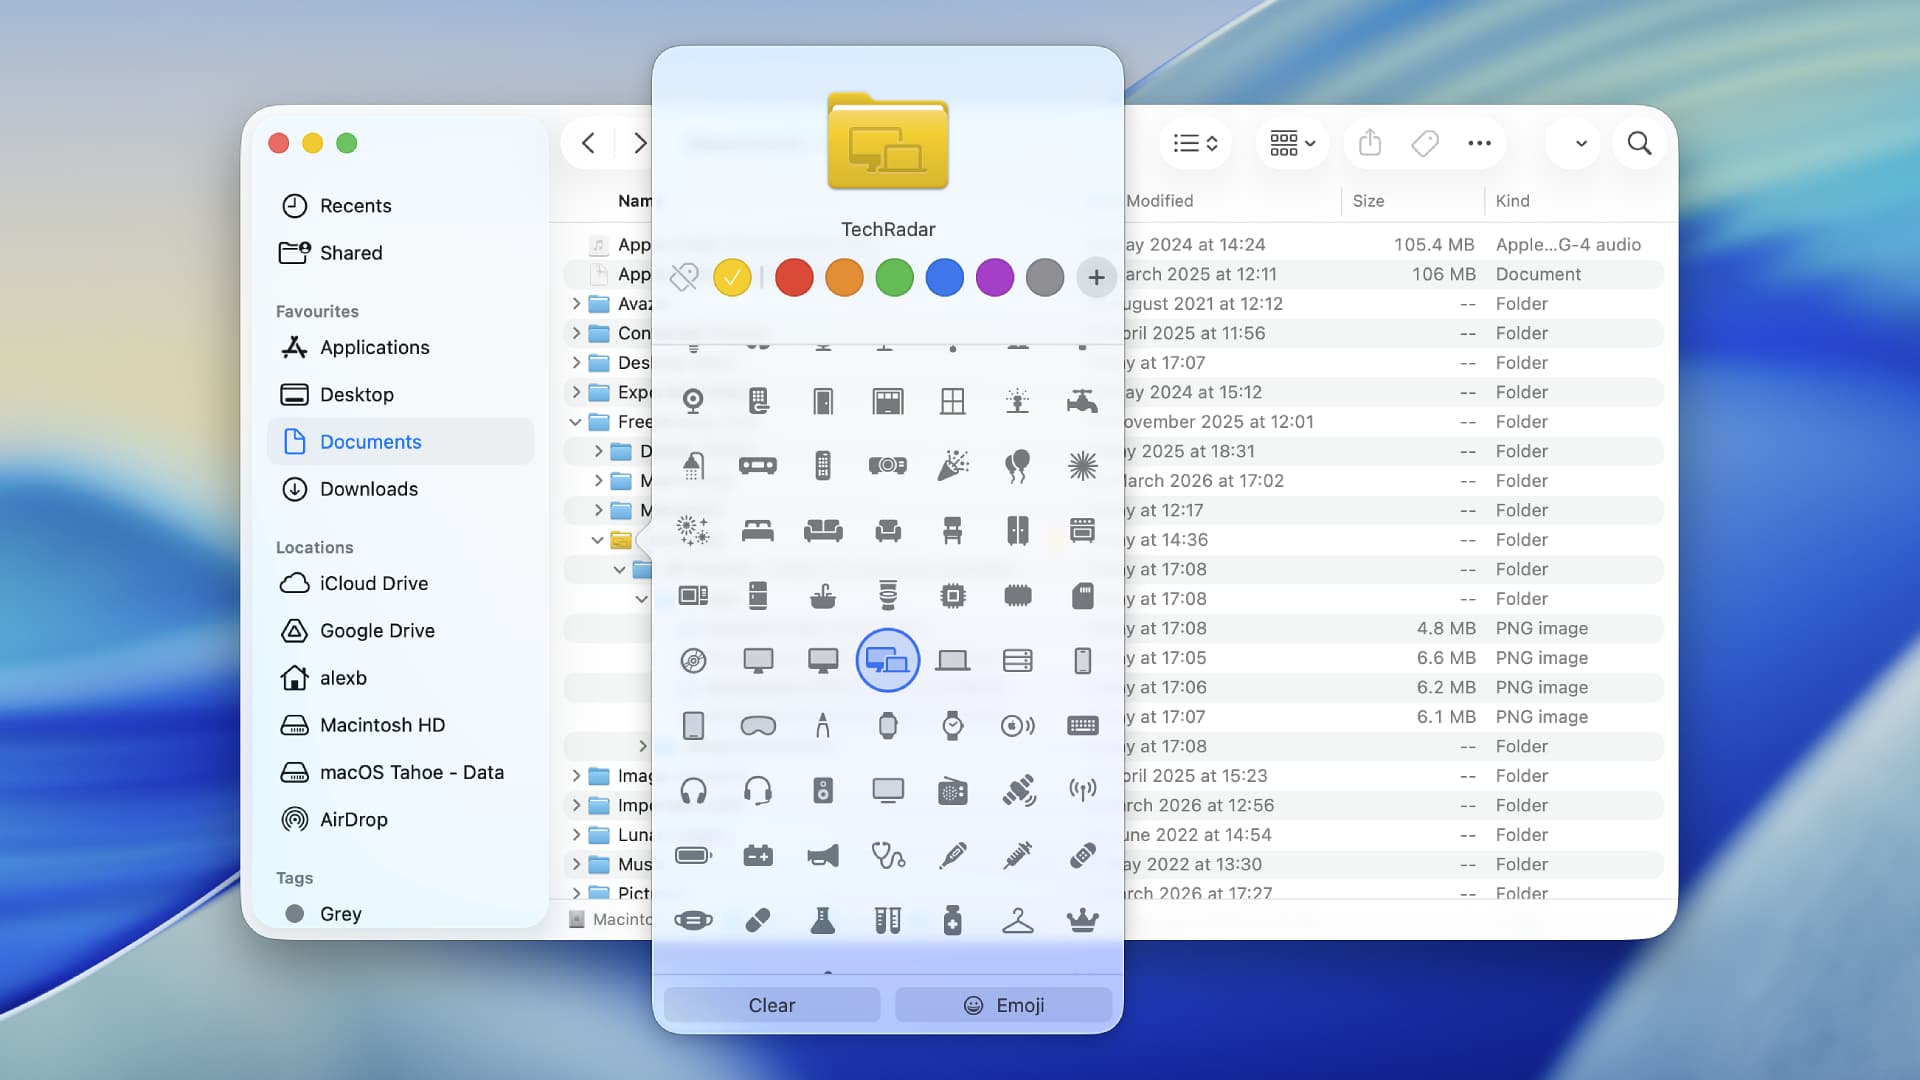
Don’t like how folders look? Their appearance can be changed by selecting one, clicking the … button in the top toolbar, then choosing Customize Folder. Here, you can change the folder’s color and add a symbol or emoji to it for quick identification.
You can even add a photo to a folder’s icon by opening the image in the Preview app, clicking Edit > Copy in the menu bar, then right-clicking the destination folder and selecting Get Info. From here, click the folder icon at the top, then press Edit > Paste from the menu bar. The image should now be displayed over the folder.
We spoke earlier about moving files, but Finder offers a lot of advanced ways to do this. To keep a file in its original location and put a copy somewhere else, for example, click the item, press and hold the Option key, then click and drag the file into a new folder.
To duplicate a file within its parent folder, select it and press Command + D. Or to move an entire folder’s contents somewhere else in one go, move your mouse to the immediate left of the folder’s name in the top toolbar until a folder icon appears, then click and drag this folder wherever you want it to go.
And given how deeply Apple integrates all of its devices, it might not be a surprise to learn that the Finder can be used to sync files from one Apple product to another. When you connect your iPhone or iPad to your Mac, it’ll appear in the left-hand sidebar of the Finder. Click it to sync items – such as movies or music – onto your device.
How does the Finder compare to Windows 11?
Both the macOS Finder and Windows’ File Explorer have a lot of similarities, which should make it fairly painless to switch between them.
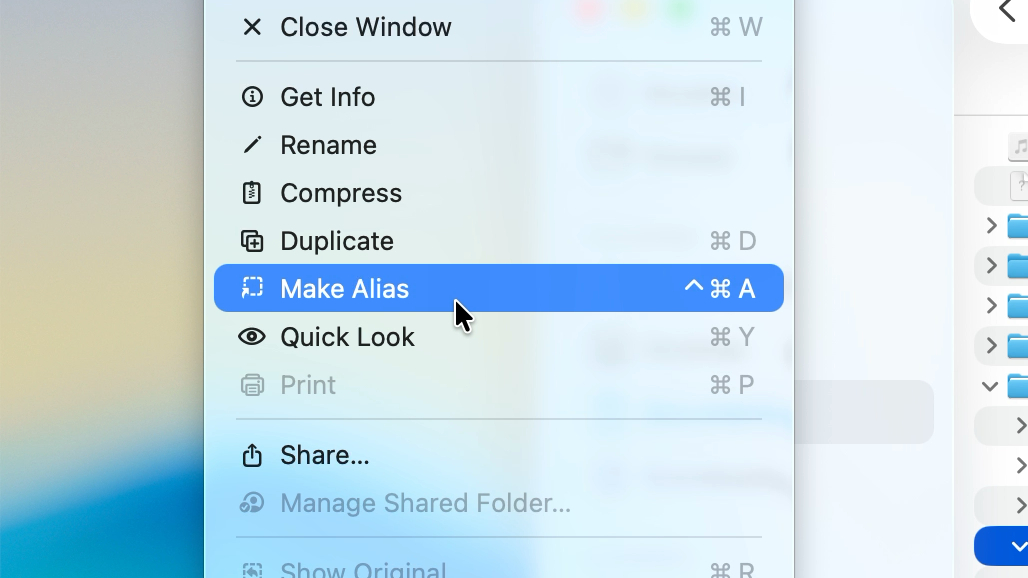
For instance, while Windows has shortcuts, macOS’s Finder has aliases. Despite the different names, they do similar things. An alias (or shortcut) lets you create a virtual copy of a file and place it anywhere you want. Double-click the alias and you’ll open the original file. To create an alias, click the file, then select File > Create Alias from the Finder’s menu bar. You can then move the virtual copy wherever you want.
There are some small differences, though. For one thing, your current folder’s location is at the top of the File Explorer in Windows, whereas it sits at the bottom of the macOS Finder (if you don’t see it, open the Finder and click View > Show Path Bar in the menu bar).
And unlike the File Explorer in Windows, the Finder’s left-hand sidebar does not let you navigate through folders. Instead, the folder view is found in the main Finder pane. You can see the folder structure by using the List view or the Columns view.
How do you customize the Finder?
We’ve already covered a few ways you can customize the Finder to your needs. That includes changing the view, adding custom colors and images to your folders, and more. But those aren’t the only ways you can adjust Apple’s file organizer.
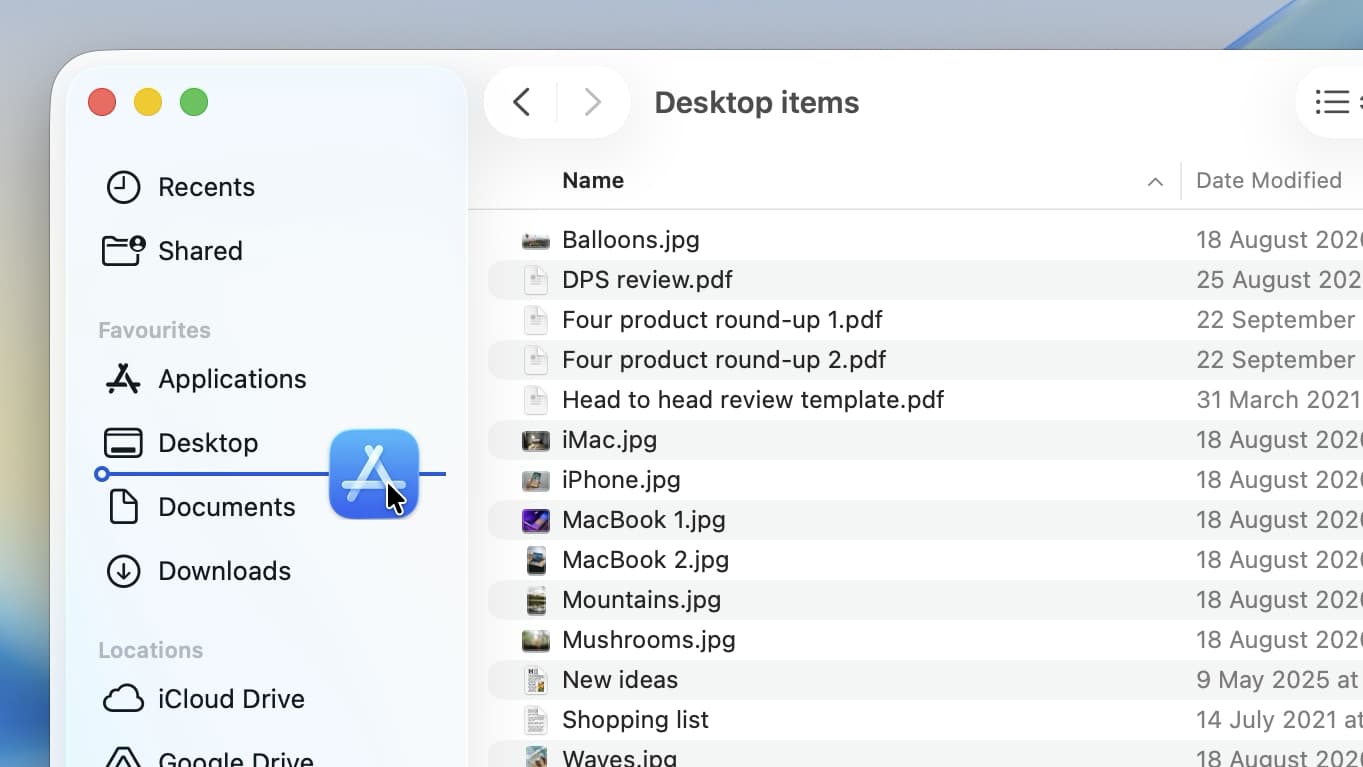
Let’s start with the Finder’s sidebar. To add a folder to the sidebar, just drag and drop it into the Favorites section. Apps and files can be added by holding Command before moving them to Favorites.
You can remove a folder from the sidebar by dragging it out until an X icon appears, then letting go of your mouse pointer. Similarly, sidebar items can be rearranged and reordered using your mouse. For a more comprehensive way to change what’s in the sidebar, click Finder > Settings > Sidebar in the menu bar.
To hide the sidebar entirely, click View > Hide Sidebar in the Finder’s menu bar. To resize it, move your mouse pointer to the sidebar’s right-hand edge until the pointer changes to a left-and-right-arrow icon, then click and drag.
The top toolbar can also be changed as required. You can hide it by clicking View > Hide Toolbar and show hidden items by clicking the >> button (this only appears if your Finder window is too small for the entire toolbar to fit). Rearrange items by holding Command and dragging them around. Like the sidebar, you can add apps and files by holding Command and moving them into place. To add or remove toolbar buttons, click View > Customize Toolbar.
If you want changes you make to one folder to apply to every folder on your Mac by default, click View > Show View Options, make your changes, then click Use as Defaults at the bottom.
And that should be everything you need to get to grips with the macOS Finder. Its beauty lies in its ability to be both simple and deep at the same time, giving you a quick way to manage your files and power tools when you want something a little more advanced. It’s easy to see why it’s become such an iconic part of macOS.
Follow TechRadar on Google News and add us as a preferred source to get our expert news, reviews, and opinion in your feeds. Make sure to click the Follow button!
And of course you can also follow TechRadar on TikTok for news, reviews, unboxings in video form, and get regular updates from us on WhatsApp too.