

Apple AirPods have always doubled as wireless microphones during meetings, phone calls, and FaceTime sessions, but for many years, there was no way to capture audio using AirPods while recording video in the iPhone’s camera app.
Now, though, iOS 26 has added the ability to use Apple’s best wireless earbuds as a video mic in supported camera apps, meaning you can treat your AirPods like one of the best wireless mics while capturing video content.
Note that this feature is exclusive to the AirPods 4, AirPods Pro 2, and AirPods Pro 3, and it isn’t currently available in all countries or regions (Apple doesn’t specify which countries, though we know EU regions are excluded at the time of writing). So, if you can’t see any of the Settings mentioned in the tutorial below, hardware limitations or regional restrictions may be to blame.
In any case, here’s how to set up and use AirPods as a video mic in iOS 26.
5 hidden iOS 26 features you NEED to try – YouTube 
Watch On
Tools & requirements
- An iPhone running iOS 26
- AirPods 4, AirPods Pro 2, or AirPods Pro 3
Quick steps
- Set up your AirPods as a Camera Remote in Settings
- In the Video section of the Camera app, open Control Center
- Tap Camera Controls, then change the Audio Input to AirPods
- Press the stem on your AirPods to start recording
How to use AirPods as a video mic
1. Set up your AirPods as a Camera Remote
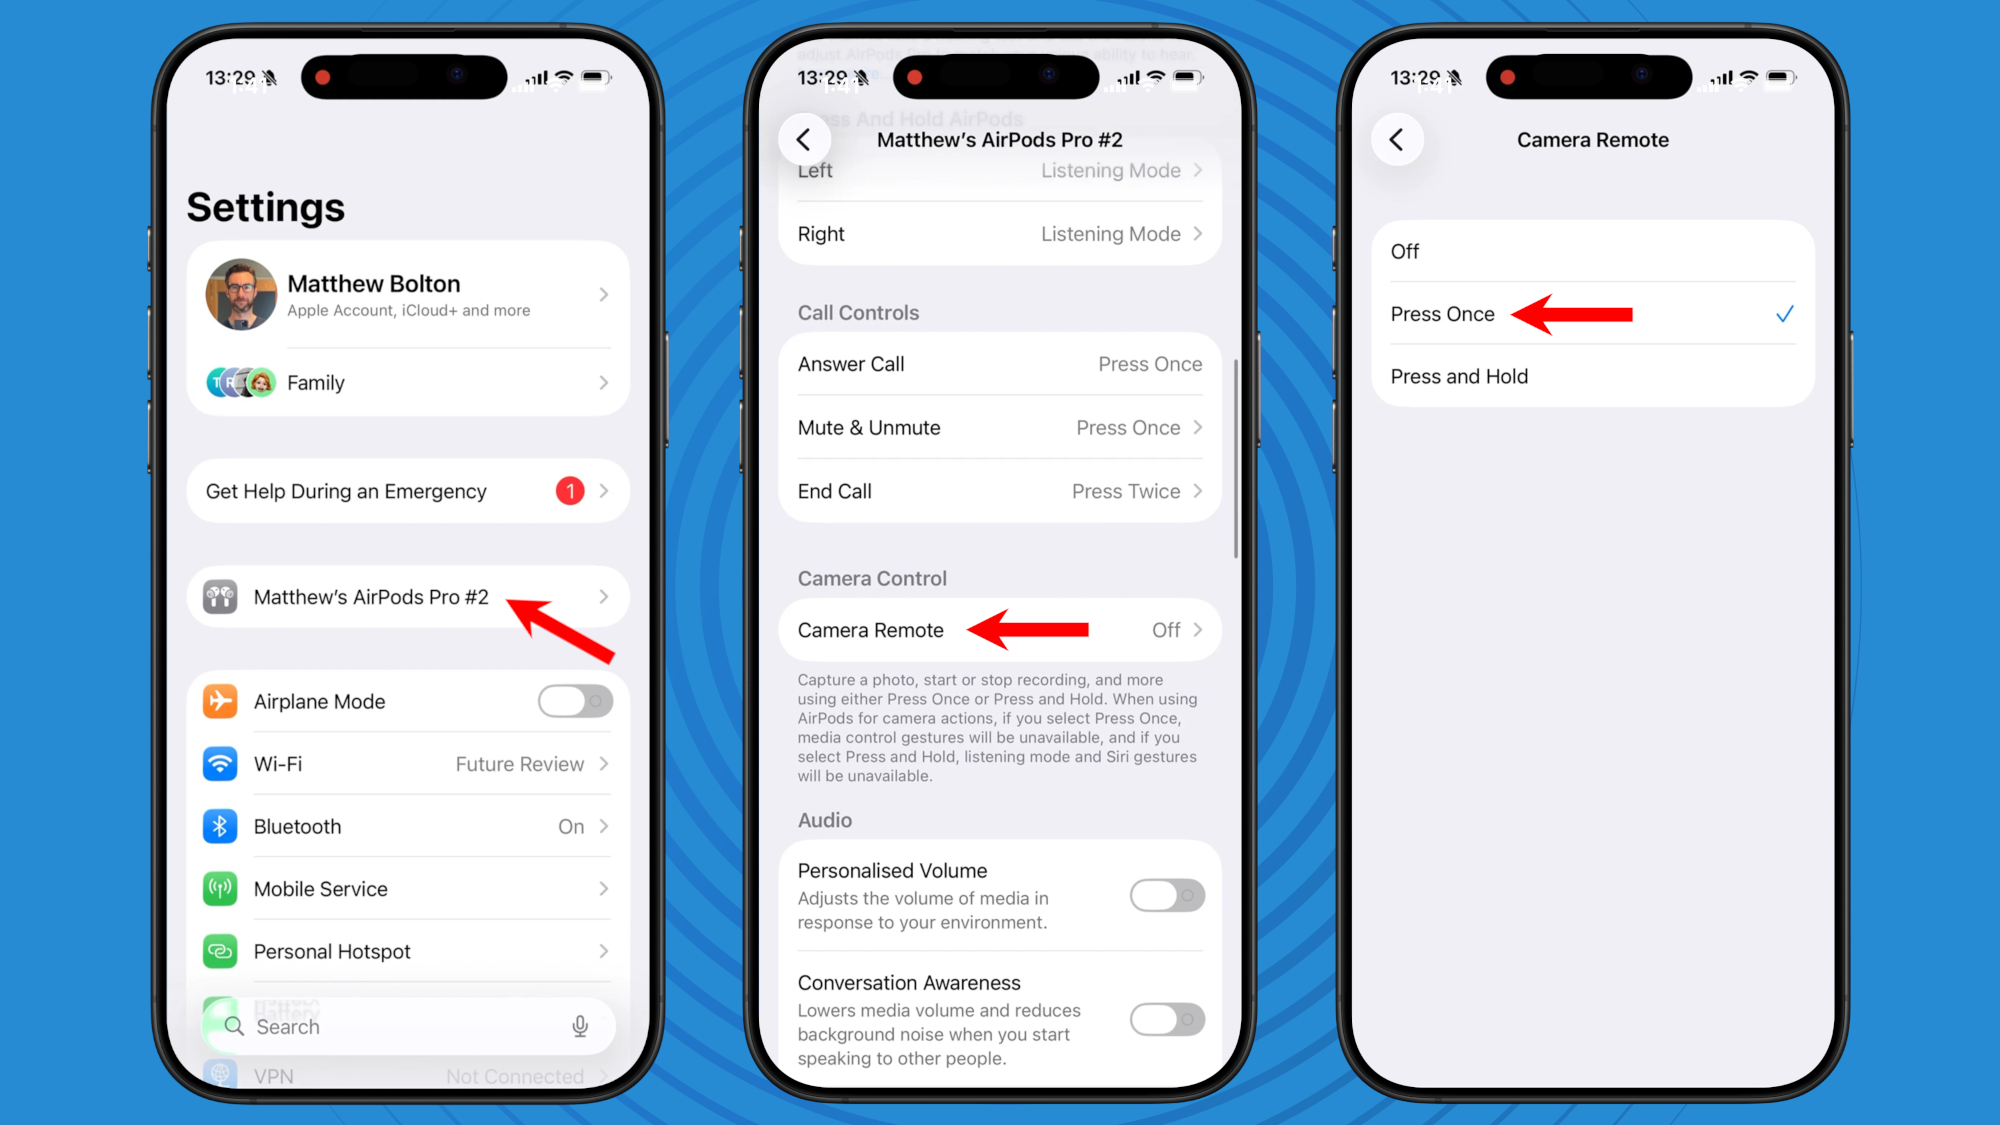
First, you’ll need to set up your AirPods as a Camera Remote. To do this, wear your AirPods, then go to the Settings app on your iPhone. Tap the name of your AirPods, then scroll down to Camera Control. Tap Camera Remote, then select either Press Once or Press and Hold. Note that, if you select Press Once, media control gestures will be temporarily unavailable while you’re using the camera app, and if you select Press and Hold, listening modes and Siri gestures will be temporarily unavailable in the same scenario. This setup process only needs to be completed once.
2. Access Camera Controls in the Camera app
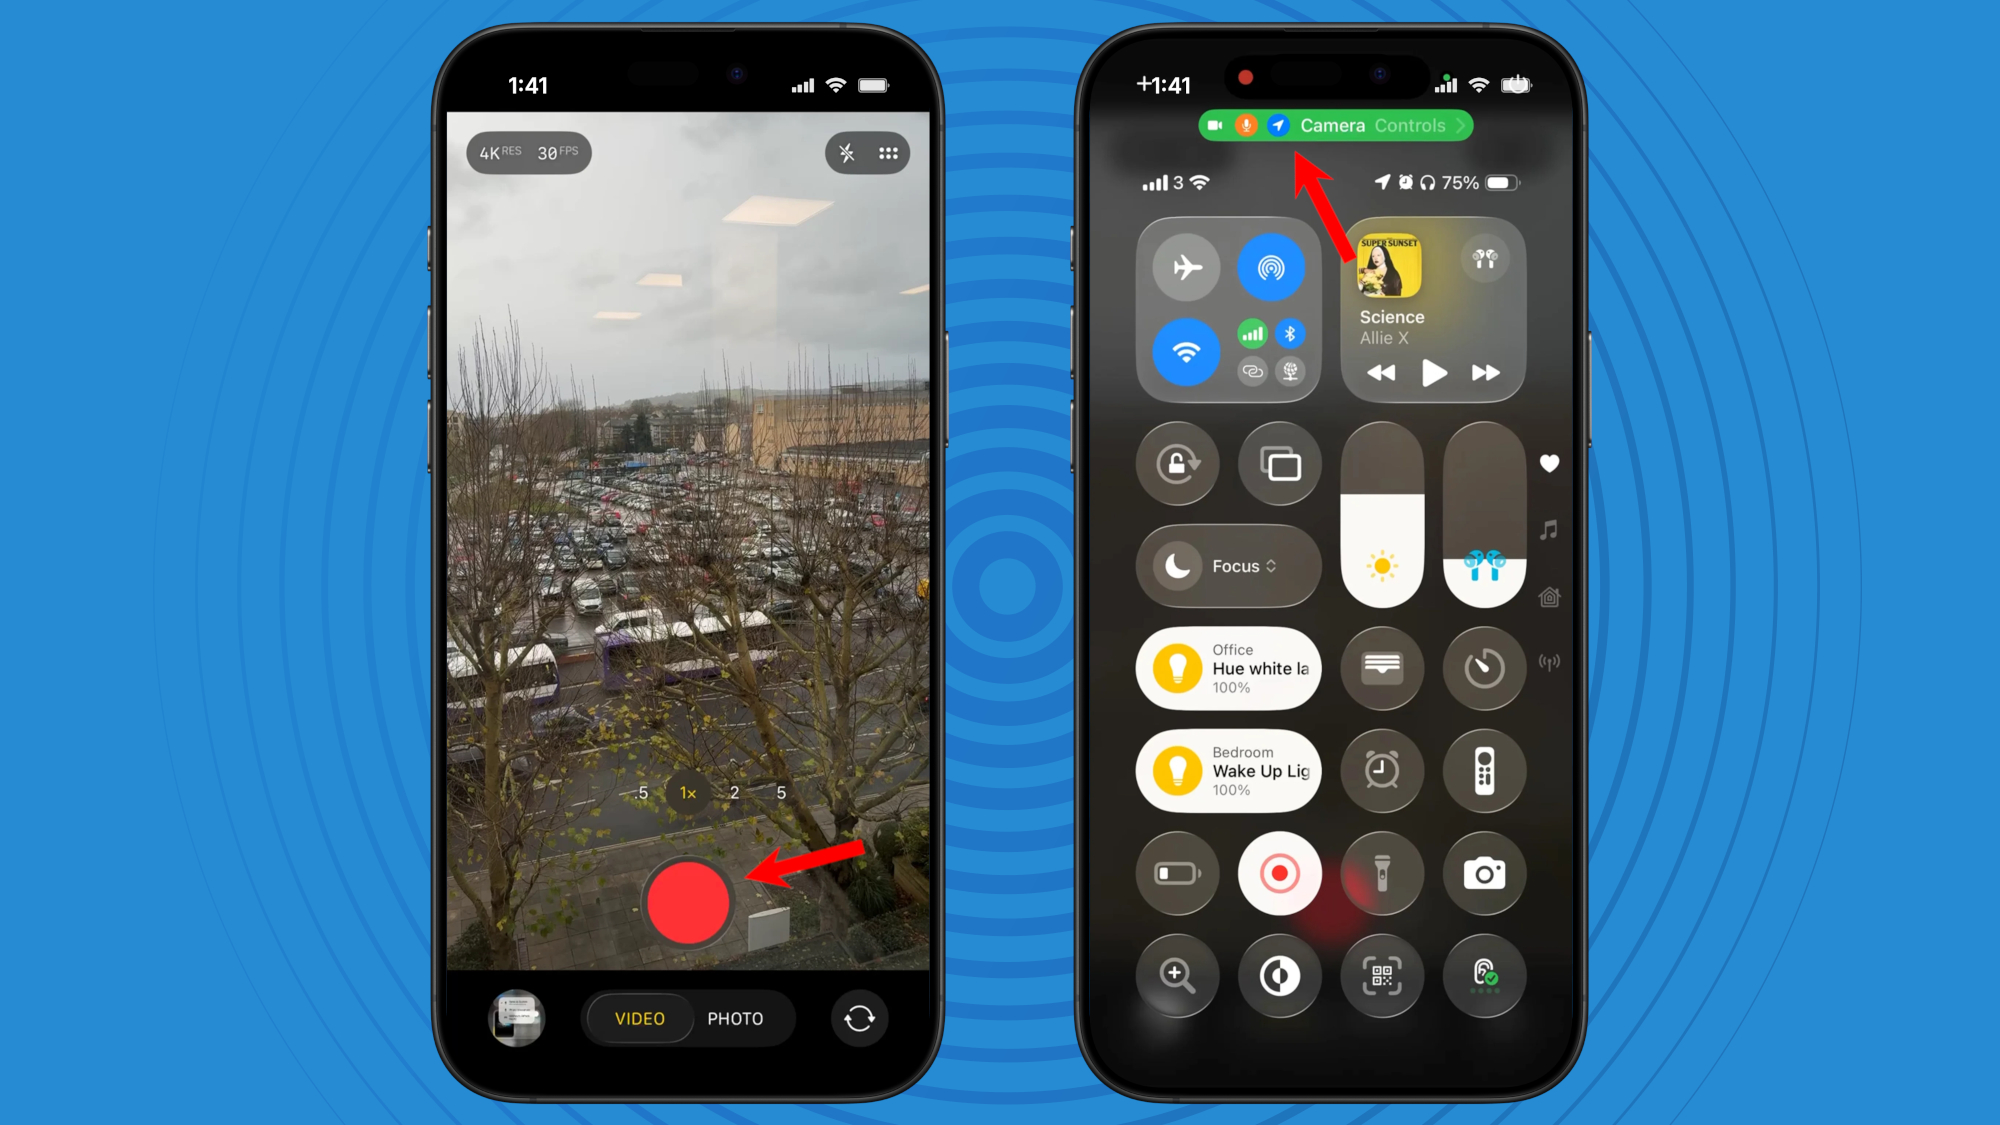
Now that your AirPods are ready to be used as a microphone, open the Camera app, swipe across to Video mode, and swipe down to access the Control Center. At the top of the page, you’ll see a Camera Controls option; press it.
3. Select your AirPods as the Audio Input
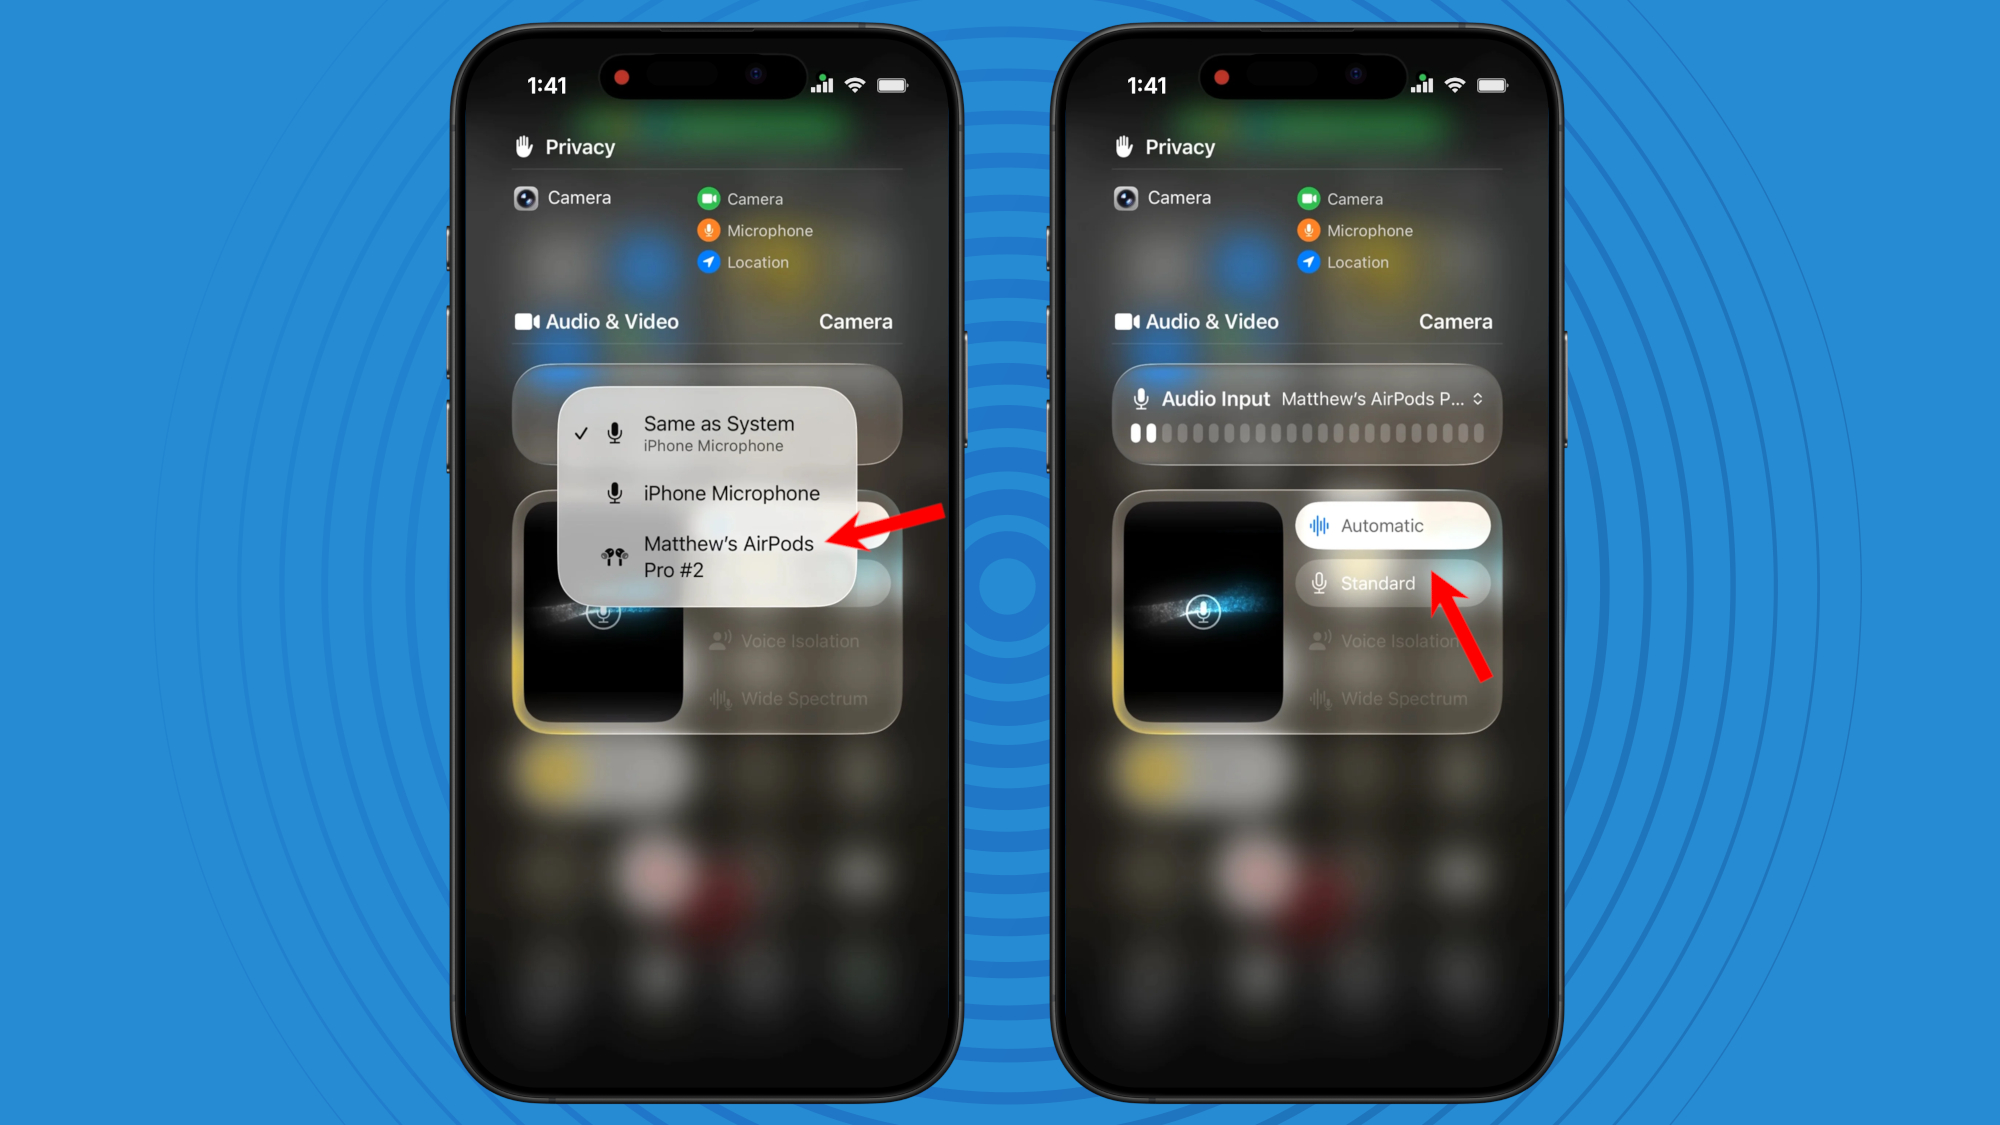
Under Audio & Video, select Audio Input, then your AirPods. You can also change the Mic mode from Automatic to Standard, Voice Isolation, or Wide Spectrum in the section below. Automatic lets your iPhone decide the optimal mode based on the conditions of your environment; Standard is the default audio processing option; Voice Isolation reduces background noise and emphasizes speech; and Wide Spectrum captures more environmental noise.
4. Press the stem on your AirPods to start recording
Depending on which setting you enabled earlier, you’ll either need to press the stem on your AirPods to start recording or press and hold the stem. Remember that, while you’re in the Camera app, certain normal AirPods functions will be disabled.
And that’s it! Now you can freely use your AirPods 4, AirPods Pro 2, or AirPods Pro 3 to wirelessly capture audio while recording video in the iPhone Camera app.
Of course, Apple’s earbuds are primarily designed to deliver sounds, not capture them, so if you’re a serious content creator (or someone who regularly conducts video interviews), you’ll still want to consider one of the best wireless mics from the likes of DJI, Rode, and Boya.
Follow TechRadar on Google News and add us as a preferred source to get our expert news, reviews, and opinion in your feeds. Make sure to click the Follow button!
And of course you can also follow TechRadar on TikTok for news, reviews, unboxings in video form, and get regular updates from us on WhatsApp too.
Comments are closed, but trackbacks and pingbacks are open.