Android 15 has arrived with a renewed focus on security and privacy features that offer new ways to keep your phone and your data safe.
As usual, Pixel phones are at the front of the line for the update, while others may have to wait a few weeks or even months, but once you’ve got Android 15, you’ll be able to take advantage of features like an enhanced Lockdown Mode that blocks file access through your USB port when engaged, partial screen recording to save you from inadvertently leaking private data, and Private Space — a new feature that finally gives you a secure vault for those apps you don’t want others to see.
While Private Space won’t hide your apps from a determined hacker who has unfettered physical access to your phone, it will keep sensitive apps from being seen by casual observers, whether that’s your confidential apps for work or your guilty pleasure video games. You can put whatever you want into your Private Space, where it will all be locked behind a password or biometric security, and you can even use a different authentication method from the one you use to unlock your phone for an extra level of protection.
How to set up Private Space in Android 15
If the idea sounds intriguing, you can enable it on your phone as soon as you’ve updated to Android 15. Here’s how to set up your Private Space.
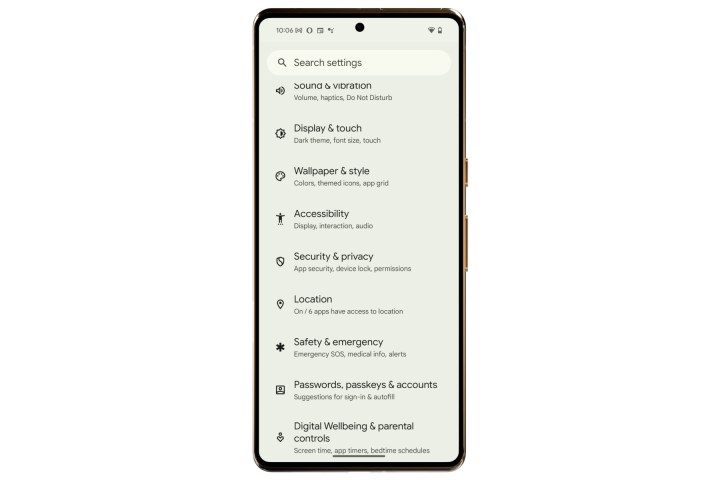
Step 1: On your Android phone, go to the Settings app.
Step 2: Scroll down and select Security & privacy.

Step 3: On the next page, tap on Private Space.
Step 4: You will now see a security prompt requiring the preferred device unlock method, which could be a passcode or your fingerprint.
Step 5: Once past the security verification, you will land on the Private Space page where some details and steps are outlined.
Step 6: Select the green pill-shaped Set up button in the bottom-right corner of the screen.
Step 7: Next, you will be asked to enter your Google account credentials.
Step 8: After verifying the account details and agreeing to the terms and conditions, your Private Space is ready to set up.
Step 9: To begin with, you will be given an option to use the same authentication as the lock screen, or use a fresh password to access the Private Space.
Step 10: Once you’ve picked up the unlock method, Private Space is ready to use.
How to add apps to your Private Space
Once you’ve set up Private Space for the first time, you need to add apps in the secret container. Here, you might see some preinstalled Google apps already appearing in the lower half of the window. But you must install your own apps here, as that’s what the feature is all about. To do that, follow the steps listed below.
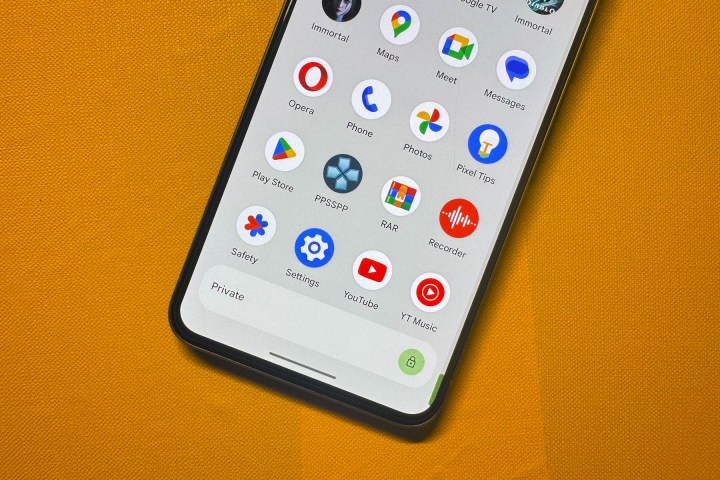
Step 1: Pull up the app drawer on your phone and scroll to the bottom. Here, you will see a horizontal bar labeled Private.
Step 2: On the right edge of the Private Space widget, select the lock icon and verify your identity.
Step 3: You will now see the Private Space dashboard. Here, tap on the round button with a + icon to install apps. These apps won’t appear in the app library and will only be visible in the Private Space window.
Step 4: Once you’re done adding and accessing the sensitive apps, select the pill-shaped Lock button in the top-right corner of the Private Space window.
Step 5: If you want even more security for Private Space, you can choose to hide the Private banner at the bottom of the app library. To do so, open the Private Space settings page and enable the Hide private space option.
Step 6: When you “hide” the Private Space, it will no longer show up at the bottom of the app library. Instead, you will have to type Private in the search bar at the top of the home screen.
What else do you need to know about Private Space?
Private Space is a fantastic feature addition, but there are a few caveats you should know. First, you cannot drag and drop an existing app installed on your phone into the Private Space. It requires a fresh install for apps to appear in the Private Space segment.
Next, as soon you lock the Private Space, the protected apps have their background activity paused, which means you will no longer see any notifications from them. Therefore, if you have any apps that you need to see notifications from — such as those for medical emergency alerts — keep them out of the Private Space.
Also, do keep in mind that you can’t move your Private Space to a new device. When you set up a new phone from scratch, you will have to create a fresh Private Space on it. Moreover, you will only be able to see these protected apps in the privacy dashboard and permission manager if the Private Space is not locked.
Finally, it’s worth keeping in mind that Private Space only creates a separate password-protected container on your phone. If a bad actor manages to link their computer to your phone or installs malicious apps on your device, they might be able to access your Private Space data.
We should also mention that content from a protected app will only appear in the share sheet or photo picker when the Private Space is in an unlocked state, so you need to be aware of that as well. Finally, all the content you create as original, or that is downloaded from the internet, will be stored separately depending on the app’s protected status.
